Pages

Monday, February 22, 2010

The Pistachio Project

If there's one thing we love at house number 1211, it's pistachios. It's true. In this house, we can pound pistachios. Whether we're eating them already shelled or peeling while snacking during a game or during happy hour, pistachios disappear quickly in my house. The weeone loves them and she loves nothing more than to spend some quality time with Pap (my dad) eating pistachios. It's their bonding time.

So when I suggested to the weeone that we crust chicken nuggets with ground pistachios, her little eyes looked like saucers and joyful anticipation spread across her face along with her toothy grin. Game on.

So I ground some pistachios in the food processor. I contemplated adding some breadcrumbs or other filler, but decided I'd rather have a chicken nugget that was not fully coated than have one that was coated and subpar. Can't have subpar nuggets, you know.


Then two boneless skinless chicken breasts were cut into sizeable nuggets, dredged through egg and then rolled in the pistachio crumbs. I sprayed my favorite old baking stone with some Pam and tossed the nuggets on board. With the oven set to 425, I let them slide into the heat ready to bake like a high school girl on Spring Break. Do you remember those days? We would lay in the sun for HOURS...scorching ourselves silly. When I look 65 when I'm 45, remind me that it's my own darn fault!


Anyway, while the nuggets were baking, I sliced some grape tomatoes and set them aside, and boiled some angel hair pasta. I also melted some light butter, added a bit of 2% milk and cream cheese and Penzey's Brady Street Cheese Sprinkle to make a garlicky, cheese, yummy, albeit thin sauce. I'm a total sucker for Brady St...it's soooo good on soooo many things. I buy it by the truckload. I love it sprinkled on veggies, popcorn, just about anything really!

So, that's how this one dish dinner came to be. Some angel hair with halved grape tomatoes topped with a garlicky cheesy sauce and piled high with pistachio-crusted chicken nuggets.


The weeone and I thought we'd died and gone to heaven!

Pistachio Crusted Chicken Nuggets

1/2 cup pistachios, ground in the food processor
16 oz boneless skinless chicken breasts
1/2 cup egg substitute or egg whites or whole eggs
cooking spray

Preheat oven to 425 degrees. Cut the chicken into sizeable nuggets. Dip each nugget into the eggs then roll in pistachios until covered. Place on a stone or baking sheet and bake for about 20 minutes or until cooked through, flipping half way.

Nutritional Info ( 4 oz serving )- Cal 211, Fat 8g (1g Sat, 2g Polyunsat, 3.3g Monounsat), Chol 55g, Sod 221mg, Potassium 150mg, Carb 4.2g, Fiber 1.5g, Sugar 1.5g, Pro 33.5g

Saturday, February 20, 2010

If you need me....Try the cookbook section

It's true that I read a lot. A LOT. Since I got my Kindle I think I read even more. But the one kind of book that I won't turn to the Kindle for is a cookbook. I suppose that one day there will be a good electronic device to replace a cookbook, but so far, nothing beats the real thing. But the thing about cookbooks is that they're sort of addictive, at least for me. One is not enough. Ten is not enough. Heavens, I'm not sure how many I have, but it's certainly not enough!

Even though I love to buy, peruse, and collect cookbooks, I don't really use all of them for cooking. I suppose that I might turn to a particular one at a particular time...a seafood book for a seafood dinner, etc. Generally, though, I have 5 or 6 cookbooks that are my go-to books. They're by authors I trust and include flavors and ingredients that I generally like.

The cookbooks that I use on a regular basis share a few traits that makes them ideal for my cooking life. They all include healthy recipes using primarily fresh ingredients. The recipes are generally ones that are straightforward, use simple cooking methods and are not day-long projects. I like recipes that are easy to get on the dinner table in a short amount of time.

On any given given day you'll likely find one of these great cookbooks open on my kitchen counter while I'm sauteeing away at the stove - So check them out at your local library, bookstore or online...


Ellie Krieger, The Food You Crave


Ellie Krieger, So Easy


Baton Rouge, LA Junior League, River Road Recipes


Pam Anderson, The Perfect Recipe for Losing Weight & Eating Great


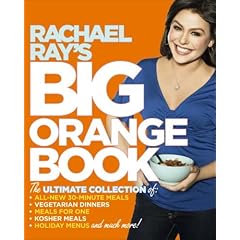
Rachel Ray, The Big Orange Book


Tuesday, February 2, 2010

A first recipe from the Steamy Kitchen -

I am a fan of the Steamy Kitchen website. Jaden Hair (@steamykitchen on Twitter) makes good food. She makes amazing food. The girl can cook. So when her cookbook, The Steamy Kitchen Cookbook, came out last year - I wanted it. In a big way. My mother happily obliged my want by gifting it to me at Christmas. I was ecstatic when I opened it. For those of you who don't know, I love cookbooks. Not just to cook from - I love to read them. I will lay in bed at night and read a cookbook as if it was John Grisham's latest novel. I know, I know, I'm odd. But I'm pretty sure we established that many, many posts ago.

So here's the thing - I swear that in another life I was Asian. I love Asian food of all kinds and am quite ambitious when trying new things. Don't ask me to try something in an Indian restaurant - I just won't. But in an Asian restaurant I'll try anything. So when I got the Steamy Kitchen Cookbook - I was excited. But I was also terrified. You see, I'm an okay cook. Give me a recipe and I can generally follow it. But every Asian recipe I've tried.....FAIL. Big time.

I.can't.cook.Asian.food.

I don't know why. Maybe it's stage fright? Maybe it's a self-fulfilling prophesy at this point. Whatever it is....it is. And now I had this new shiny, pretty cookbook and I was scared.

So it took me a little while to get the courage up to try anything. And when I finally decided last week to cook from it, I thought I should start with a simple thing. I should start with Fried Rice. So I did. And here's what happened....

So I like crustaceans, we know this, so the peel and devein shrimp thing was familiar territory and helped me get over my gametime nerves. Plus, I like the creepy slimy feel of raw shrimp. YES! I know I'm odd.

Cooking Shrimpfor Fried Rice - I can do this...I can do this...I can do this...I can do this....

Scrambling eggs? Okay...I'm getting into a groove now! What's so scary about cooking Asian food???

I didn't have leftover, refrigerated rice...uh oh. What if that is key? What if the trick is all about the leftover rice? What if fresh rice is a dealbreaker? I'm going to need a lot of Vodka if I'm going to cook my way through this book!

You put 'em all together and you shake it all around - that's what it's all about! Recipes that I can sing to are good. See, I told you I could do this! And you doubted me? Silly people.

Seeing is believing! Tasting is....well, believing! I did it! This was scrumptious! The weeone loved it, so did I. Not to mention, that I'm thoroughly impressed with my mad Asian cooking skillz now! cheers!

Perfect Shrimp Fried Rice Recipe

The Steamy Kitchen Cookbook

Serves 4

8 ounces small uncooked shrimp, shelled and deveined 1/4 teaspoon salt (or 1/2 tsp kosher salt) freshly ground black pepper 1/2 teaspoon cornstarch 2 tablespoons cooking oil (divided) 3 eggs, beaten in a small bowl 2 stalks scallion or green onion, minced 4 cups previously cooked leftover rice, grains separated well 3/4 cup frozen carrots and peas, defrosted 1 tablespoon soy sauce (use gluten-free soy sauce if you are making a gluten-free version) 1 teaspoon sesame oil

In a bowl, toss the shrimp with the salt, pepper and cornstarch. Let the shrimp marinate for 10 minutes at room temperature. Heat a wok or large sauté pan on high heat. When the pan is hot enough for a bead of water to instantly sizzle and evaporate, add only 1 tablespoon of the cooking oil and swirl to coat pan.

Now add the shrimp, quickly spreading out around the pan so that they are not overlapping. Let the shrimp fry, untouched for 30 seconds. Flip over and let the other side fry for 30 seconds, or until about 80% cooked through. Remove the shrimp from the pan onto a plate, leaving as much oil in the pan as possible.

Turn the heat to medium and let the pan heat up again. Pour in the eggs, stirring in a quick motion to break up and scramble the eggs. When the eggs are almost cooked through (they should still be slightly runny in the middle), dish out of the frying pan onto the same plate as the cooked shrimp.

Use a paper towel to wipe the same wok or sauté pan clean (no need to wash) and return to high heat with the remaining 1 tablespoon of cooking oil, swirling to coat. When the oil is very hot, add the green onions and stir fry until fragrant, about 15 seconds. Add in the rice and stir well to mix in the green onions throughout. Spread the rice all around the wok surface area and let the rice heat up, untouched until you hear the bottoms of the grains sizzle, about 1-2 minutes. Use the spatula to toss the rice, again spreading the rice out over the surface of wok or pan

Drizzle the soy sauce all around the rice and toss. Add the peas and carrots, the cooked eggs, shrimp and sesame oil, tossing to mix the rice evenly with all of the ingredients. Let everything heat back up again, until the rice grains are so hot they practically dance! Taste and add an additional 1 teaspoon of soy sauce if needed.


The Lost Art of the Menu -

I think that women used to plan out menus for the week. I think they made a menu and from that sprung a grocery list. And once they had a menu and list, they could make several different things for dinner each night. They had choices. I don't think this is a process that happens very often anymore. I don't think we plan menus - at least not most of my friends.

It seems that it's easier to go to the store and get the "regular" list of things....laundry detergent, peanut butter, grapes, milk, vodka...oh, wait, you can't get that at the grocery store! Anyway, you probably know exactly what I'm talking about. Then each afternoon there's a panic - "What shoudl I make for dinner?!?! What do I have to make for dinner?!?!" I did the very same thing.

When I started blogging about new recipes and food we liked, I got a bit more organized about menu planning AND grocery shopping. And guess what? I spend less money when I plan it all out in advance. Amazing, huh?

So, I thought I'd share what I do. When I first started menu planning I thought it would take forever and be a pain in the arse. However, what I've found is that even though I need 30 minutes to plan the week's menu and make the grocery list - it saves me the time hassle involved in the "what's for dinner" panic and saves me from falling back on eating out so much!

I have about 6 cookbooks that I like to find recipes from. You may prefer to find them online, or from magazines, or from blogs (which I think is a great source as well)! I sit down at the kitchen table with all the resources that I want to use and spend about 15 minutes flipping, turning, surfing - looking for 5 recipes. Once I find the 5, I write them on an index card that I put on my refrigerator - that way I have an easy list to refer to each day as to what I have the ingredients to make.

After I have my recipes, I make my list. I make my grocery list in my iPhone using the GroceryIQ app - it's fabu!- but you can make your list in whatever way you're comfortable, but I scan the recipes for dulplicate ingredients and list out everything I need to make my 5 meals (don't forget side items if you didn't put them on your menu). After the menu ingredients are on my list, I walk the house once to see what else I need (kitchen staples, bathroom stuff, snacks, lunch items for the weeone, etc) and I'm ready to hit the grocery store.

Now I have the list of dinner possibilities AND the ingredients all ready to simplify my weekday nights. It takes some time to get into the groove of menu planning, but I think you'll love it once you do it and hopefully it will make your life a little, itsy-bit easier during your chaotic week!


Monday, February 1, 2010

A food tracking app that might just be all that!

I've been searching (along with Sarah G.) for quite some time for what we deem "the perfect food app" for the iPhone. Sarah's a dietician by training and in her heart and is the one responsible for finally getting me to drink water as well as me not gaining any weight through the holidays this past year. The next step is to get the scale to start to inch backwards. Part of that process is me tracking what I eat each day, hence the food tracker app quest.

I call it a quest because it's been like looking for the Holy Grail. You'd think that a food tracking app that allowed the user to set Calorie budgets as well as Fat, Carb and Protein Budgets, was something of a mythical creature. We had found one that was so very close to perfect in Tap & Track - a $4.99 investment got you the ability to set Calorie, Fat and Carb budgets, but no Protein (although it would track your protein). But Tap & Track's food database was a bit cumbersome, even though it was quite thorough.

But last night, I believe I found the Holy Grail! MyNetDiary.com - that's what I stumbled upon. It's an online food tracker that has apps for both the iPhone as well as Blackberry. It's free for basic services, but if you want the online version to talk to your iPhone app and you want to be able to set budgets for all the nutrients your little heart desires, it costs a few dollars a month. I felt it was well worth a trial investment to give it a test run. So today was day one using MyNetDiary. So far, so good. Is it the Holy Grail of Food Tracker Apps? I'm not 100% sure yet, but it's looking good so far!

If you live in Houston...you gotta have Mexican!

When you live in Houston you eat a lot of Mexican food. A LOT! Tex-Mex to be exact. The weeone and I probably eat Mexican food at least once each week. (well, she says twice, but that may just be her sneaking out or something). Our favorite place to go is a little dive in NW Houston called Don Jose's. It's been there since God was a child, or at least since I was a child. My family used to eat there every Friday night when I was a kid. I have the best memories of ordering a Shirley Temple, eating chips and salsa and a Number 8. For the record, the Number 8 is exactly the same meal it was when I was a little girl. I love that!

Mexican food is one of those things that I prefer to eat in a restaurant. There's usually lots of ingredients and there's some sort of magic that happens in the kitchen in a Mexican restaurant that makes food taste better. I don't know what it is, but it's definitely magical. And then there's the margaritas....frozen, on the rocks, with salt, without salt, lime, strawberry...oh the joy in those little glasses.....um, what were we talking about? Oh yeah, dinner....

When we eat Mexican food at home it's usually fajitas or tacos. But tonight...we tried something new. I made a Chicken Tortilla Stack. It was layers of flavor. Literally. =)

One of the best parts about cooking anything Mexican is the reliance on fresh ingredients. Fresh ingredients make for yummier food. It's a fact, jack! There's something about starting with a piece of produce that grew from the the ground that makes everything taste a lot better. So, out of the ground = good. out of a can = not as good.

So here you go - easy, peasy. Quick. Yummy. A little cheesy. Definitely Mexican. And did I mention yummy?


Chicken Tortilla Stack
from me =)
Serves 4

4, 8" flour tortillas ( I like to use whole wheat )
1 cup spicy black bean dip (or use reduced fat or fat free refried black beans)
1/2 cup spur-of-the-moment salsa ( diced tomatoes, diced onions, chopped cilantro, a little lime juice and 2-3 shakes of cumin)
2 cups shredded cooked Chicken Breast ( I season it with Penzey's fajita seasoning)
1/2 cup reduced-fat shredded Monterrey Jack cheese ( or any cheese you'd like!)
Cooking Spray

Preheat the oven to about 450 degrees. Spray the bottom of a springform pan with cooking spray. In a bowl, mix the shredded chicken with your spur-of-the-moment salsa. Spread 1/4 cup black beans on a tortilla, top with 1/4 of the chicken mixture then 2 tablespoons cheese. Continue with the remaining 3 tortillas to layer and stack. Back at 450 degrees for 10-15 minutes or until the stack is hot and the cheesy is gooey and melted. Cut into 4 pieces and serve right away.

Nutritional Information: Per 1/4 of stack
Calories 306, Fat 9.5g (sat fat 4.5g), Carbs 32.25g, Protein 25g, Sodium 802mg, Fiber 11g